
Skip to content

Make every vote part of a clear, verifiable campaign.

Give supporters a focused way to participate while your team controls the campaign window, eligible candidates, voting mode, and public visibility. PageantXero keeps checkout or verification separate from vote fulfillment so a vote is recorded only after the required checks pass.

Features

Campaign Setup

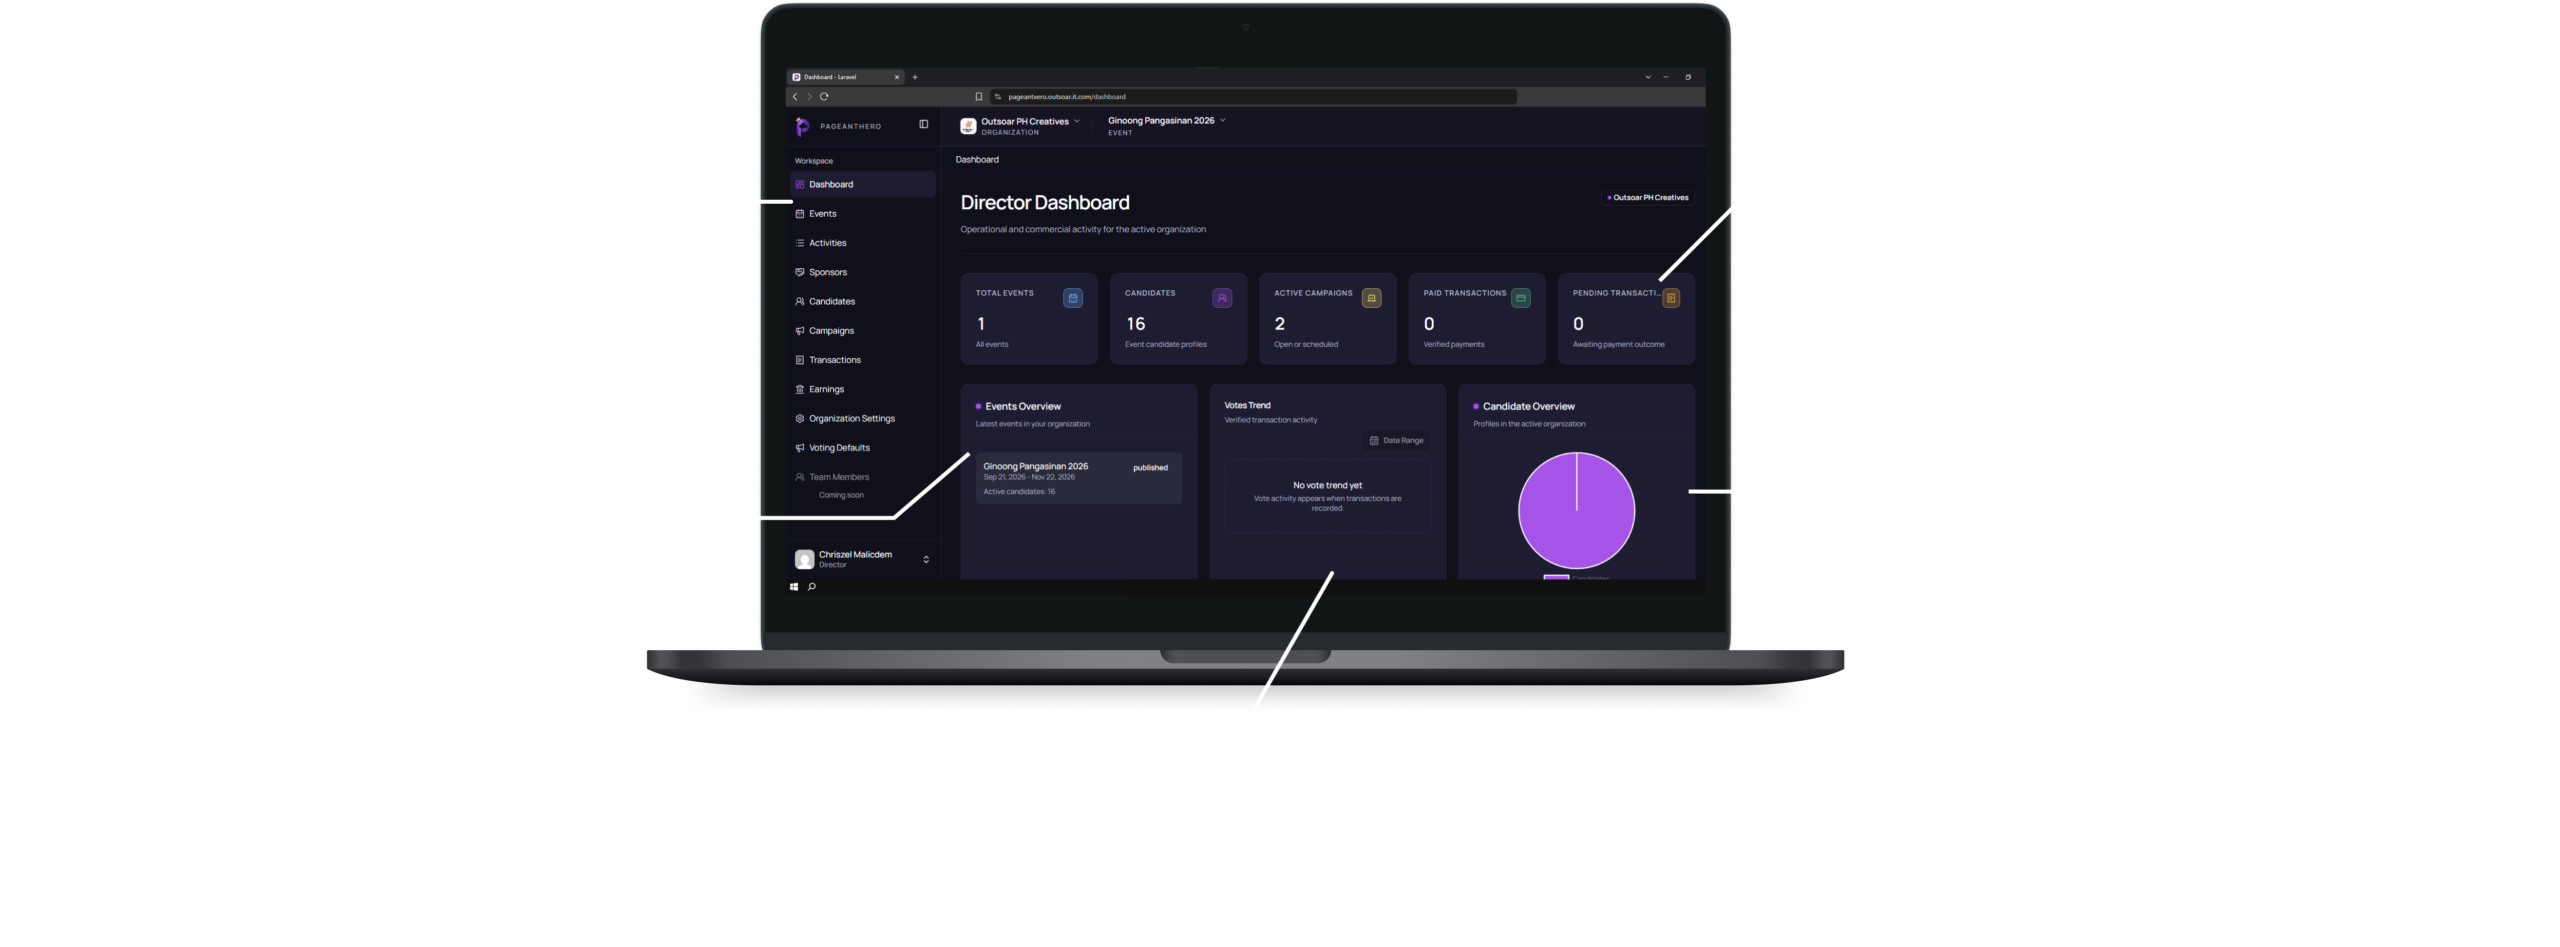
Dashboard

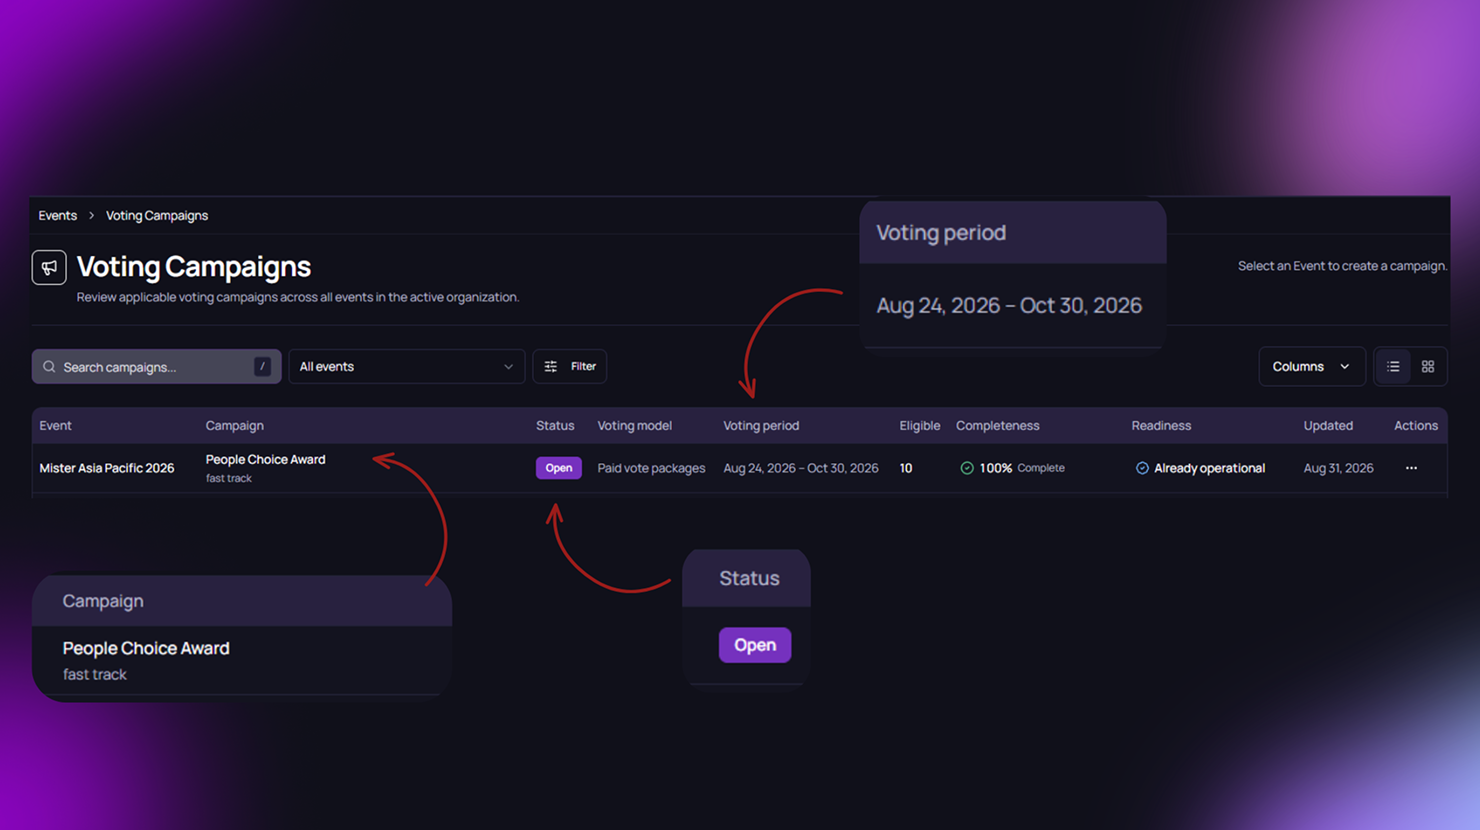
Manage All Campaigns in One List

See each campaign’s status, voting type, and voting dates for every event.

Microsite

Vote for Your Favorite

Pick a candidate and cast a vote directly from the campaign page.

Voting Boosts

Dashboard

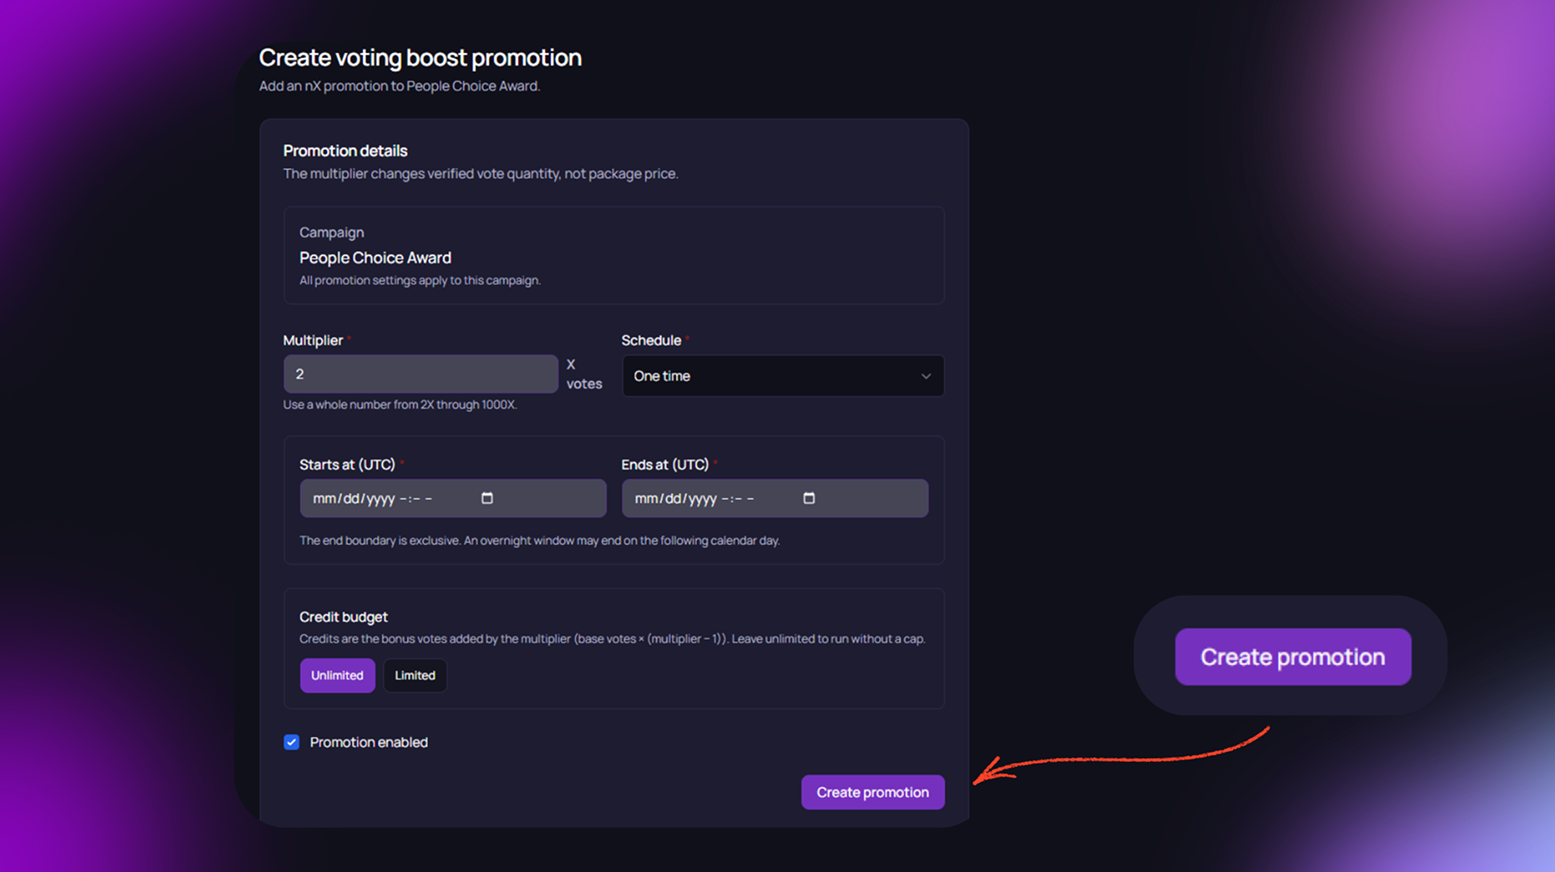
Create Vote Promotions

Add promos that help boost votes during a campaign.

Microsite

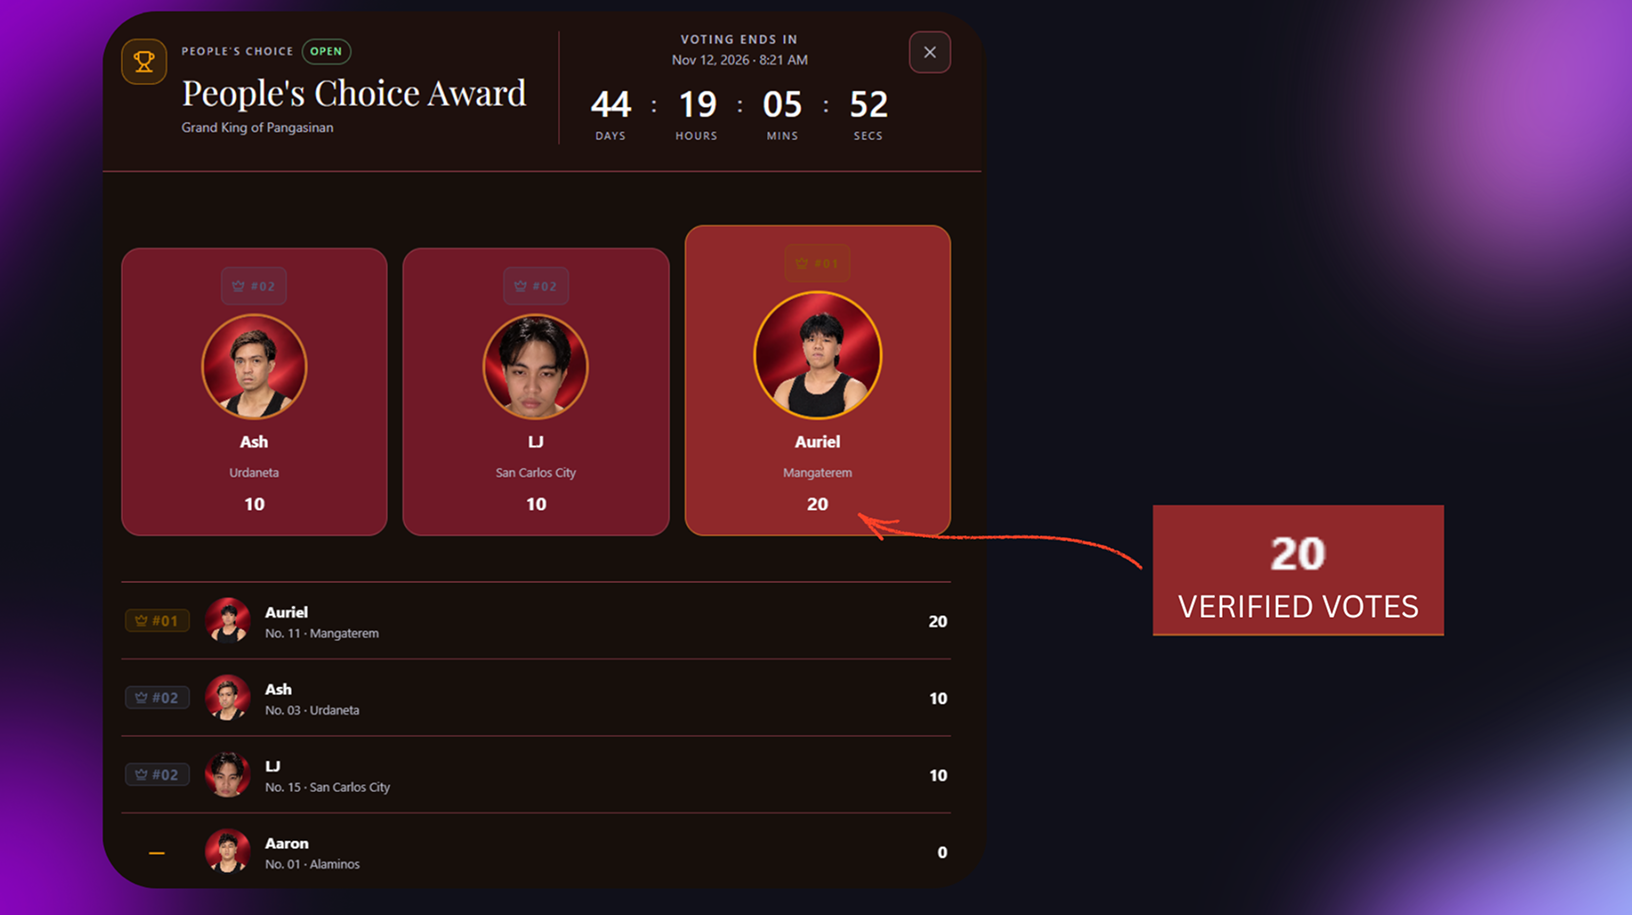
See Who's Leading

View real-time vote counts and rankings for each candidate.

Campaign Control

Dashboard

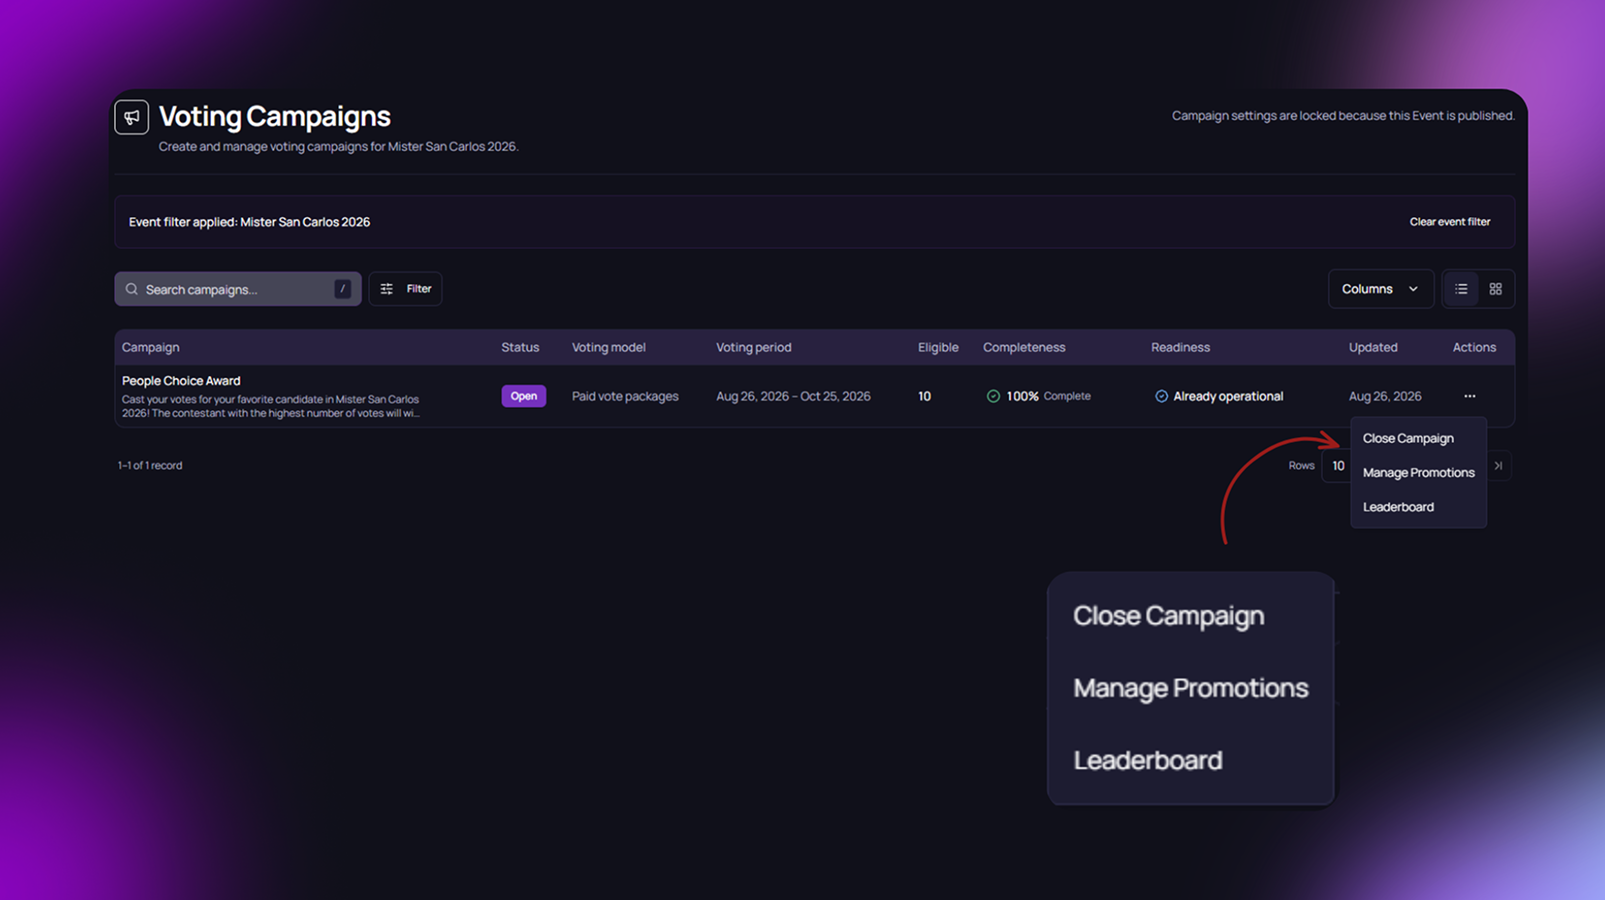
Open or Close Campaigns Anytime

Close a campaign, manage promotions, or check the leaderboard from one menu.

Microsite

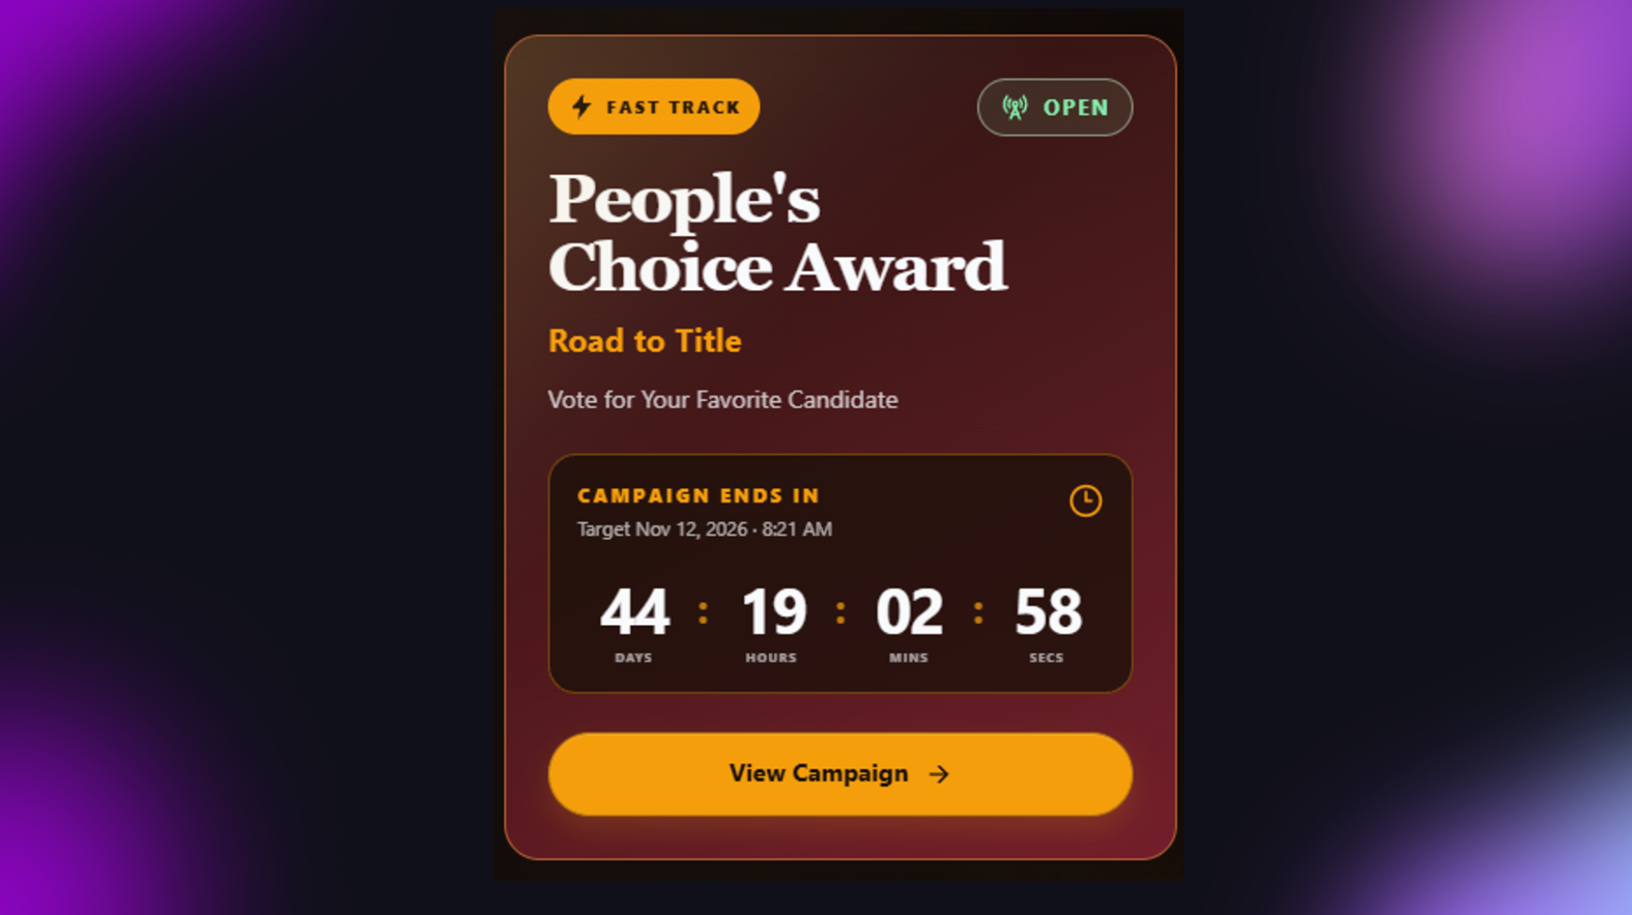
Know When Voting Ends

See a countdown showing exactly when the campaign closes.

Perks

Dashboard

Microsite

Manage Every Campaign in One Place

See all your campaigns, their status, and their dates without switching pages.

Simple Way to Vote

Pick a candidate and vote directly from the campaign page.

Boost Votes When You Need To

Add promos to help drive more support during a campaign.

See Who's Leading

Check real-time vote counts and rankings for each candidate.

Stay in Control of Every Campaign

Open, close, or check any campaign's performance anytime.

Know When Voting Ends

See a countdown showing exactly when the campaign closes.
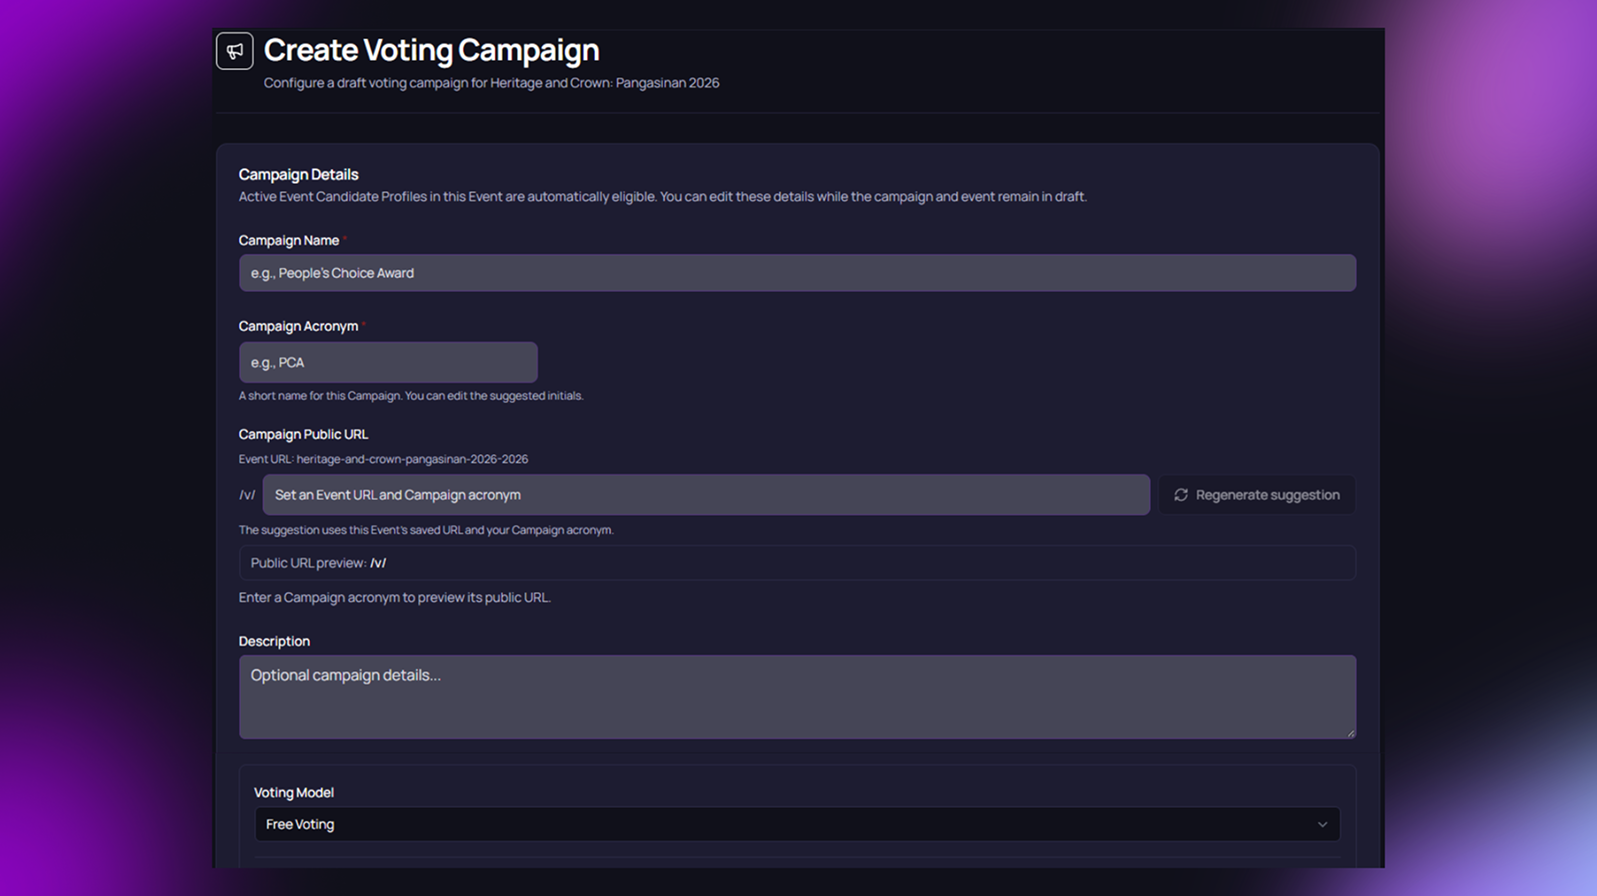
Voting workflow

Create Voting Campaign

Step 1: Name the Campaign

Type a campaign name (like “People’s Choice Award”) and a short acronym (like “PCA”), then set the campaign’s web link.

Step 2: Add a Description

Write a short note about what the campaign is for. This step is optional.

Step 3: Pick the Voting Type

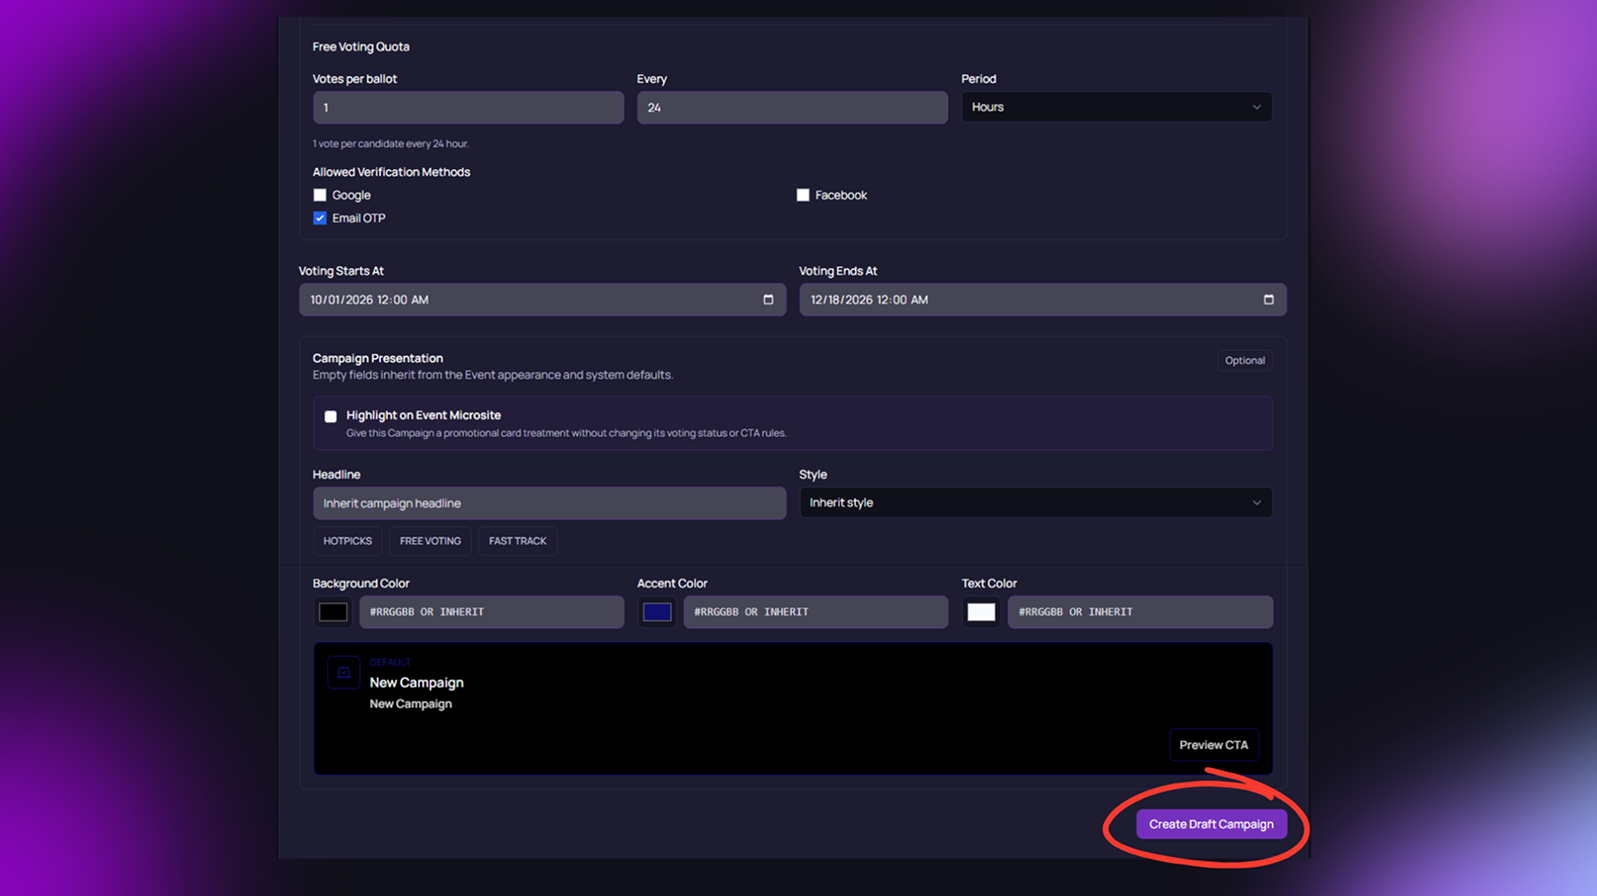
Choose Free Voting or Paid Voting, then set how many votes each person can give and how often.

Step 4: Set Voting Dates and Verification

Choose how voters can verify themselves (Google, Facebook, or Email), then set the start and end dates for voting.

Step 5: Check and Create

Check if everything is ready, make sure at least one candidate is active, then click Create Draft Campaign.

Voting Defaults

Step 1: Open Voting Defaults

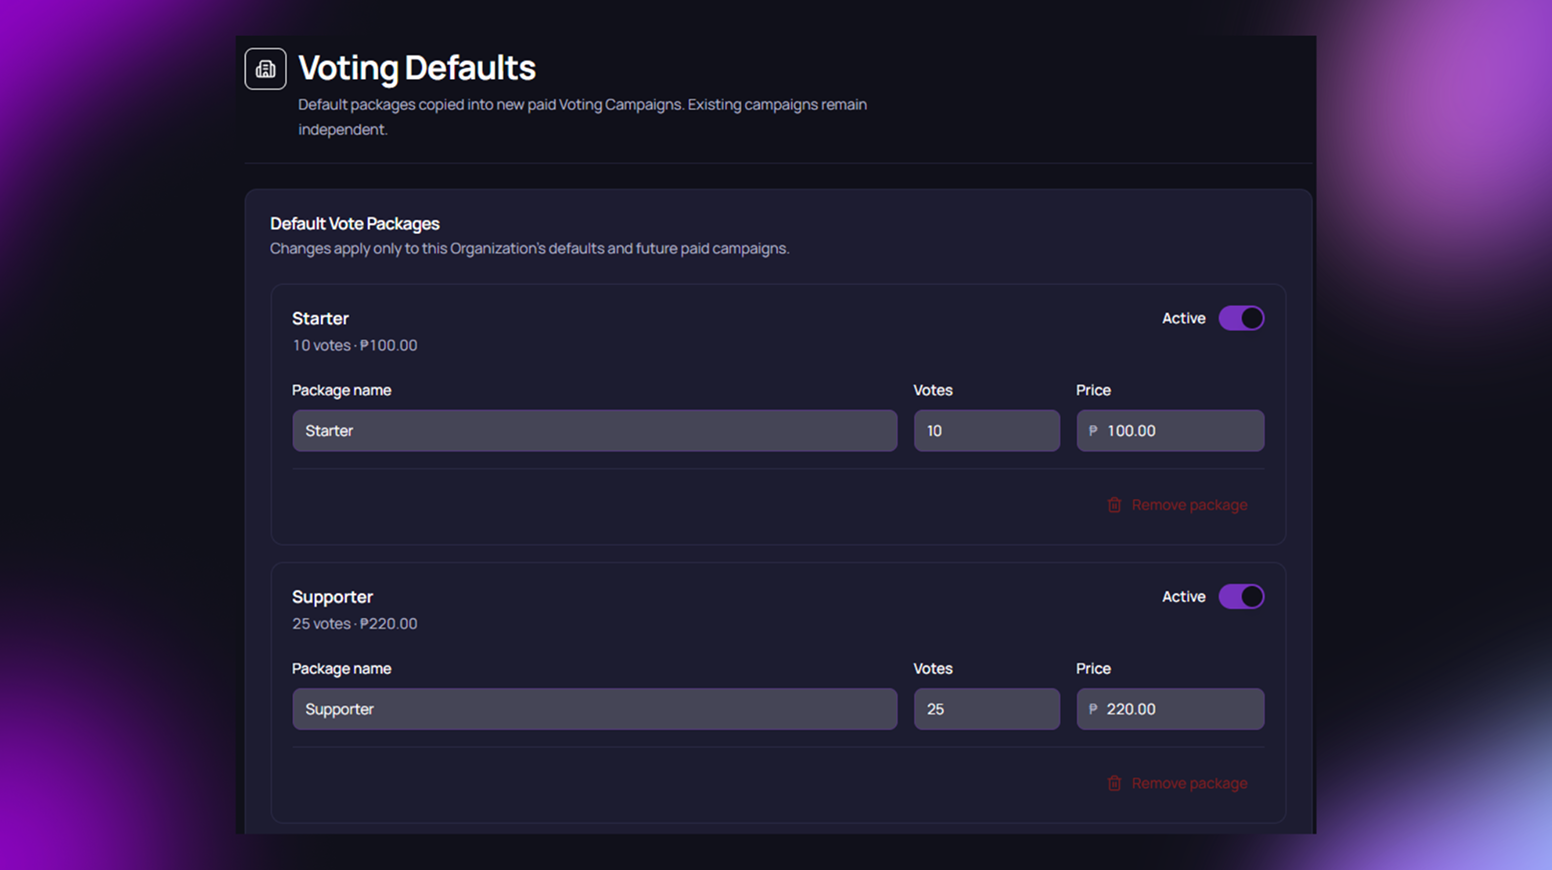
Go to Voting Defaults in the sidebar. This shows all the vote packages your organization can use.

Step 2: Check Each Package

Look at each package’s name, votes, and price. Change any value if needed.

Step 3: Turn Packages On or Off

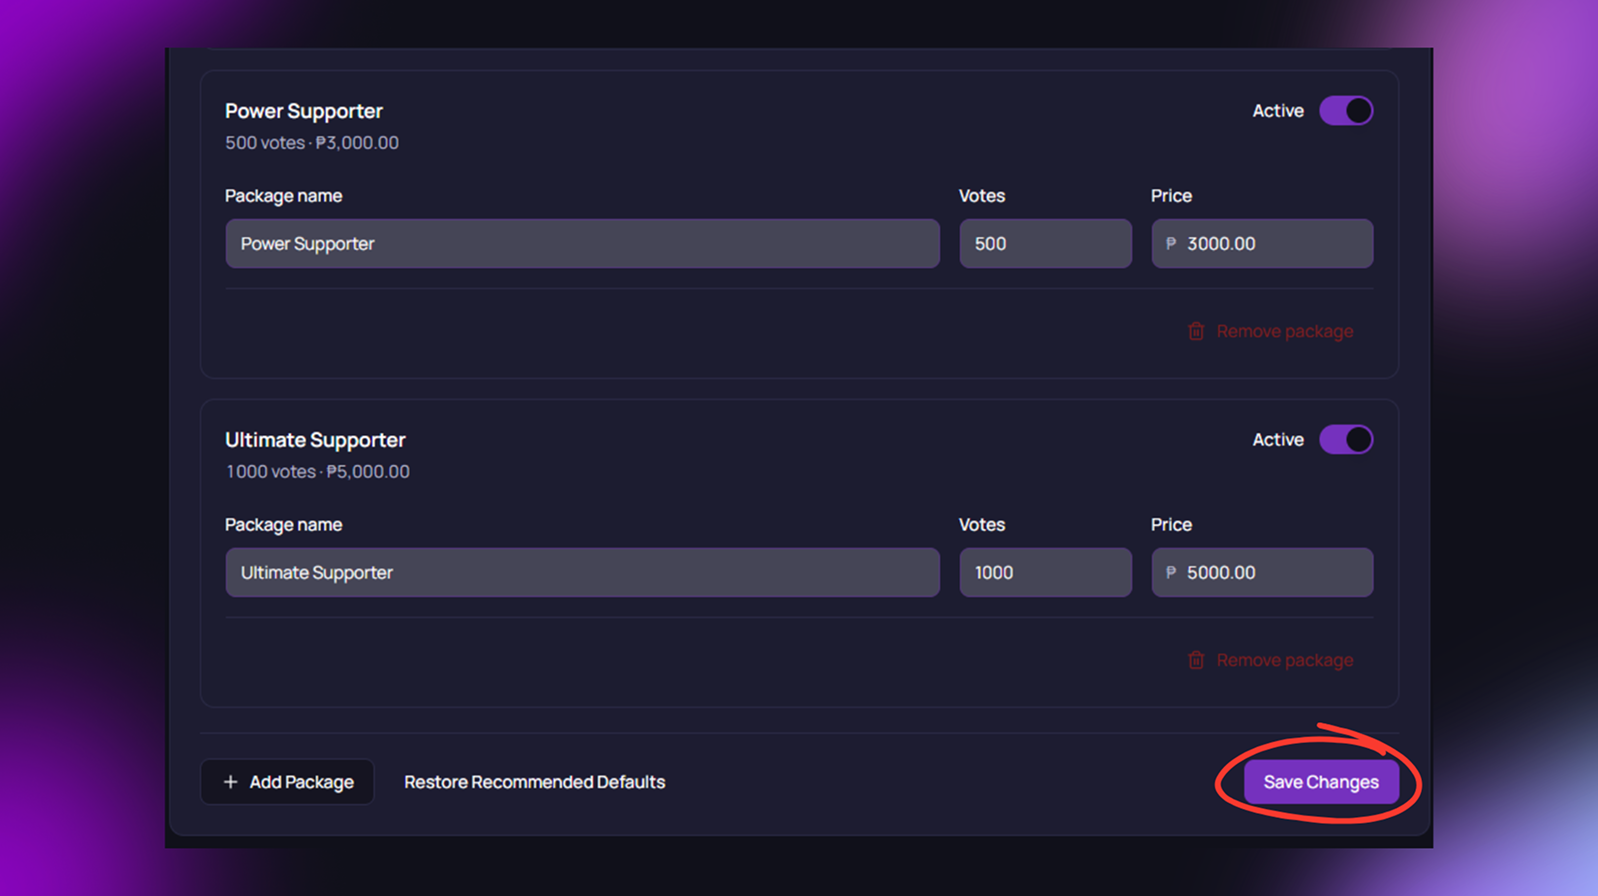
Turn a package on or off using the Active switch, so only the ones you want will show up.

Step 4: Add or Remove a Package

Click Add Package to make a new one, or Remove Package to delete one.

Step 5: Save Your Changes

Click Save Changes so your updates are used the next time you create a paid campaign.

Support your candidate

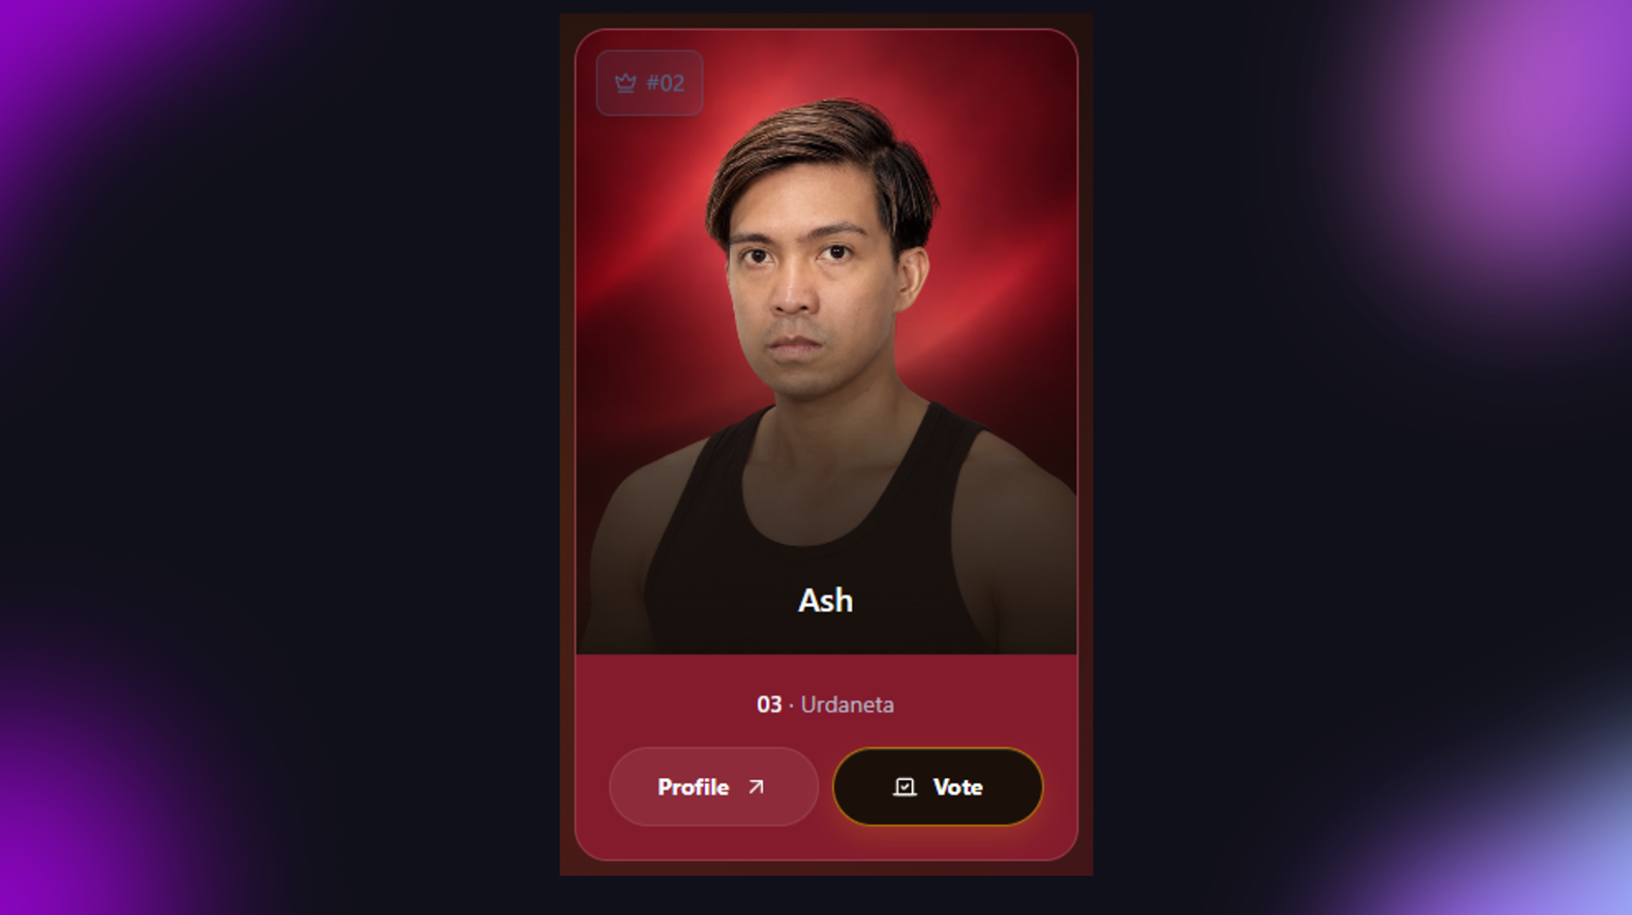
Step 1: Pick a Candidate

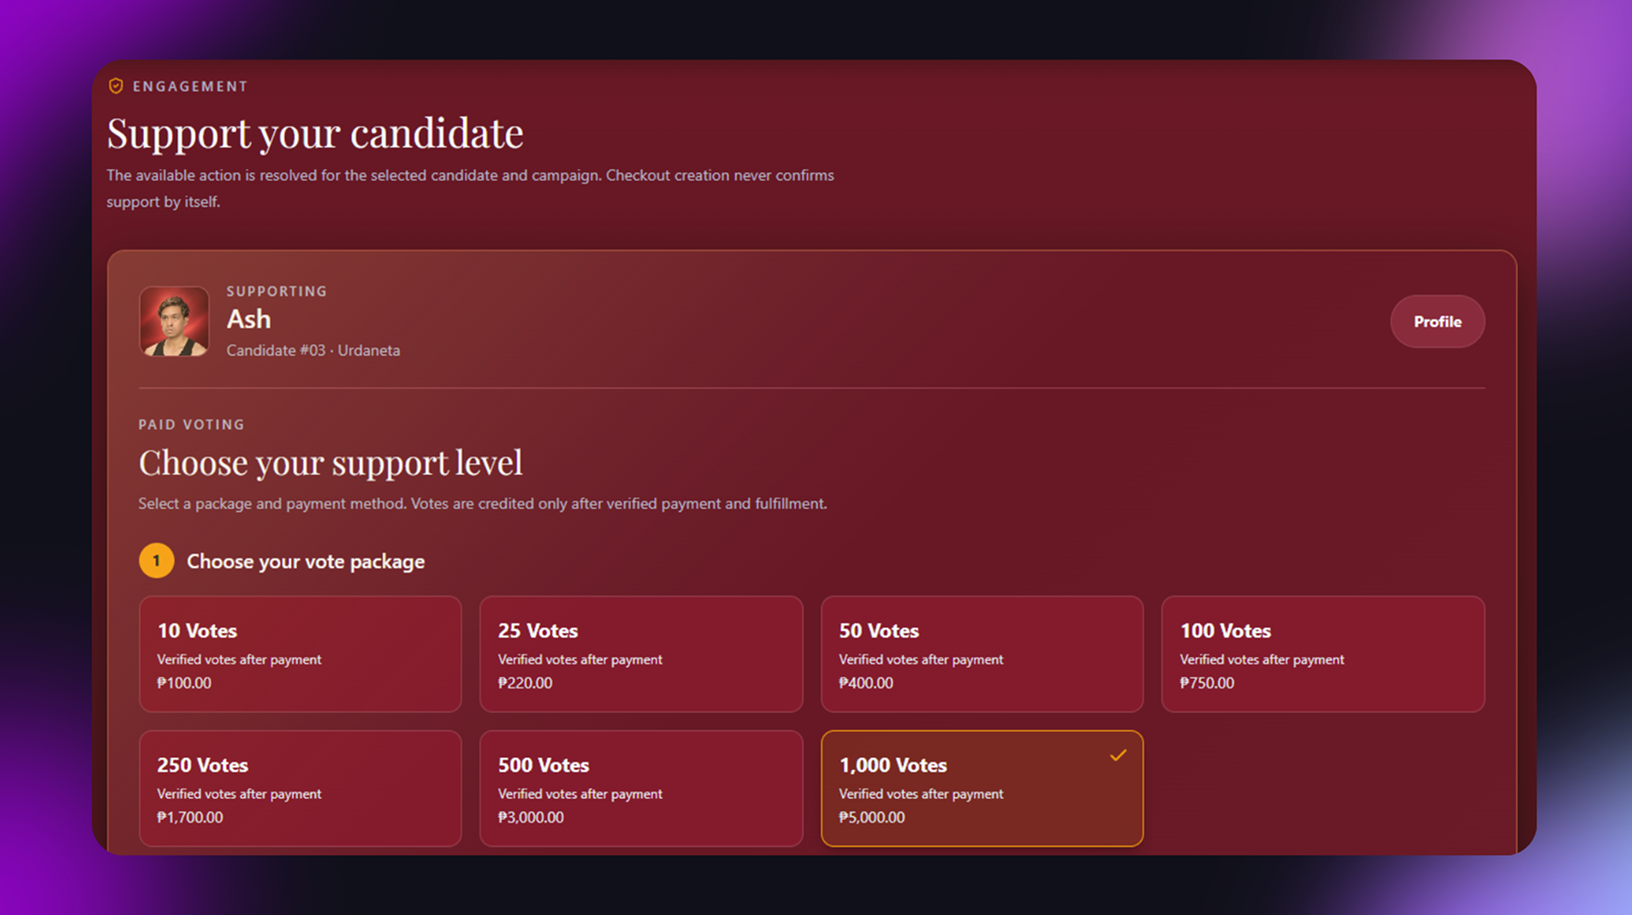
Go to the candidate’s page and check who you are supporting, like their name and candidate number.

Step 2: Choose a Vote Package

Choose a vote package, from 10 votes up to 1,000 votes, based on how much support you want to give.

Step 3: Choose a Payment Method

Select how to pay, using GCash, Maya, QRPh, or a credit or debit card.

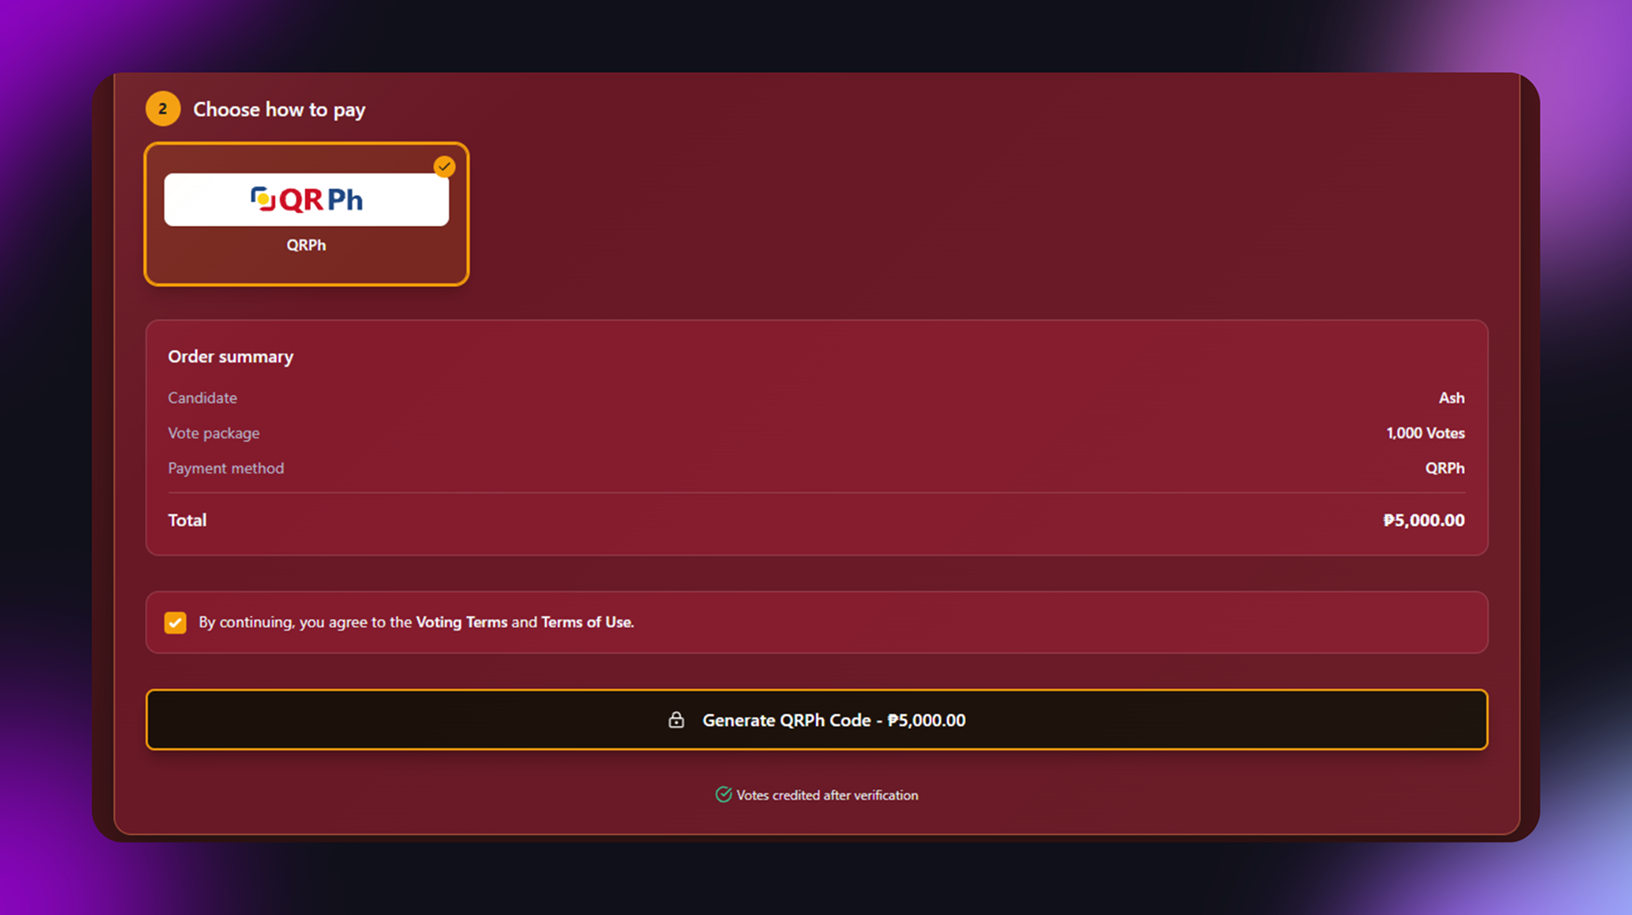
Step 4: Review Your Order

Look at the order summary to check the candidate, package, and total amount before continuing.

Step 5: Confirm and Pay

Agree to the Voting Terms and Terms of Use, then complete payment. Your vote will be added once payment is verified.

Mobile

The event microsite adjusts to fit smaller screens, keeping key details like the event title, dates, and voting status easy to read. Visitors can browse and vote comfortably from their phones, wherever they are.

Tablet

On larger screens, the microsite makes full use of the space, showing more details like the countdown timer and campaign card side by side. This gives visitors a fuller view of the event without needing to scroll as much.

FAQ

Find clear answers about using PageantXero for your event.

No. Online voting is one part of the product. PageantXero connects organization setup, event management, candidate visibility, campaigns, public experiences, payment verification, and rankings so teams can manage the lifecycle around a pageant.

The workflow starts with an organization, then an event, candidates, campaigns, public candidate experiences, voting or engagement, verification, and rankings or results. Teams can prepare these pieces before launching a live campaign.

Yes. The approved MVP allows an event to have one or more voting campaigns. Campaign configuration and launch remain separate from the event record.

No. Publishing an event makes the event available according to its configured visibility, but it does not automatically launch a voting campaign. Event publication and campaign activation are separate lifecycle decisions.

See PageantXero in action.

Explore a more connected way to plan, promote, and run your next event.

Contact PageantXero